
How to add crops and bleeds in Adobe when saving out a print ready .pdf
Creating wonderful designs is hard enough, without having the extra stress of wondering if the printers will send your design back because it doesn’t have the correct crop marks set (with bleeds).
This is a beginner level tutorial on how to create crops marks with bleed in Adobe Illustrator (same process for InDesign).
*Please note: always chat with your printer first. They may have specific needs. When they just want crop marks and bleeds, this is how.
You want to add them in the program. Please do not draw them on. Printers have imposition software that reads crop marks that are set in the software. Otherwise, they have to either do this step for you, or manually impose them.
Bleed is a printing term that is used to describe a document which has images or elements that touch the edge of the page, extending beyond the trim edge and leaving no white margin. When a document has bleed, it must be printed on a larger sheet of paper and then trimmed down. As a designer, you always want to make the printers life as easy as possible. You want them to have no trouble printing your design.
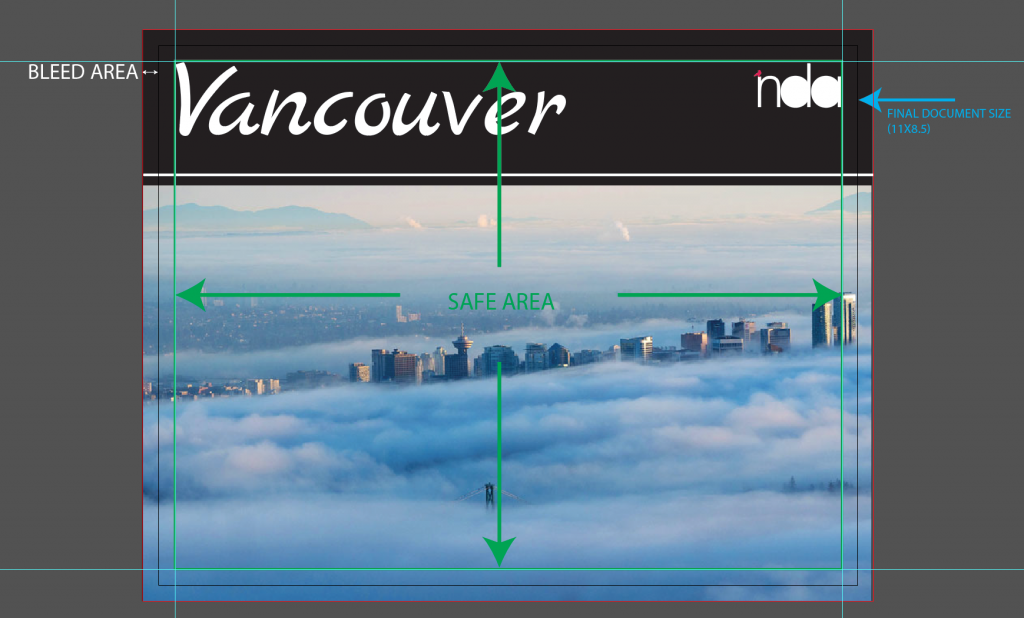
This is what we want our final printed piece to look like. Note the ink goes all the way to the edge.
We will be creating an 11″x8.5″ (industry standard is width x height), with bleed marks and set for digital press (the most common for printing small quantities).
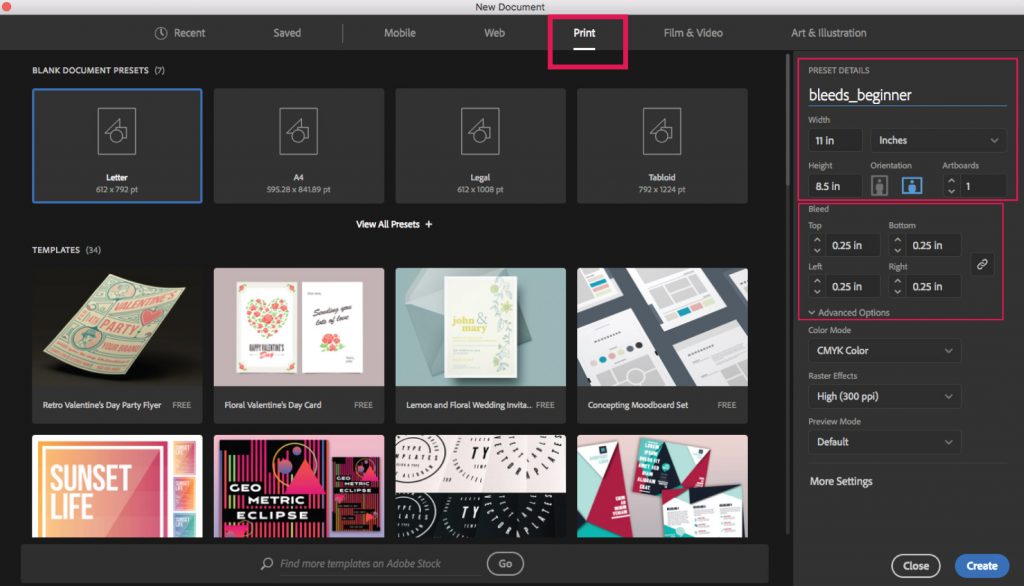
- Create a document that is 11″x8.5″ (you can select the Print option in the top menu).
- Set your bleed here (you can add it in the settings later). For digital, I suggest .25“, because digital can shift a bit when printing. Offset press, I suggest .125”.
- CMYK
- Create document
You now have a document like the screenshot below (to show guides go to: VIEW menu ‘show guides’).
Note: the ‘safe’ area. It is the area you have all the important design elements, ones that you don’t want to get cut off, such as text.
For digital printing, a good rule is .25″ inside the document. If it is double sided, give things breathing room. No double borders on each side, a good rule is, be nice to your printers and cutters.
The bleed area is from the document edge to the red line. It is set at .25″ all the way around.
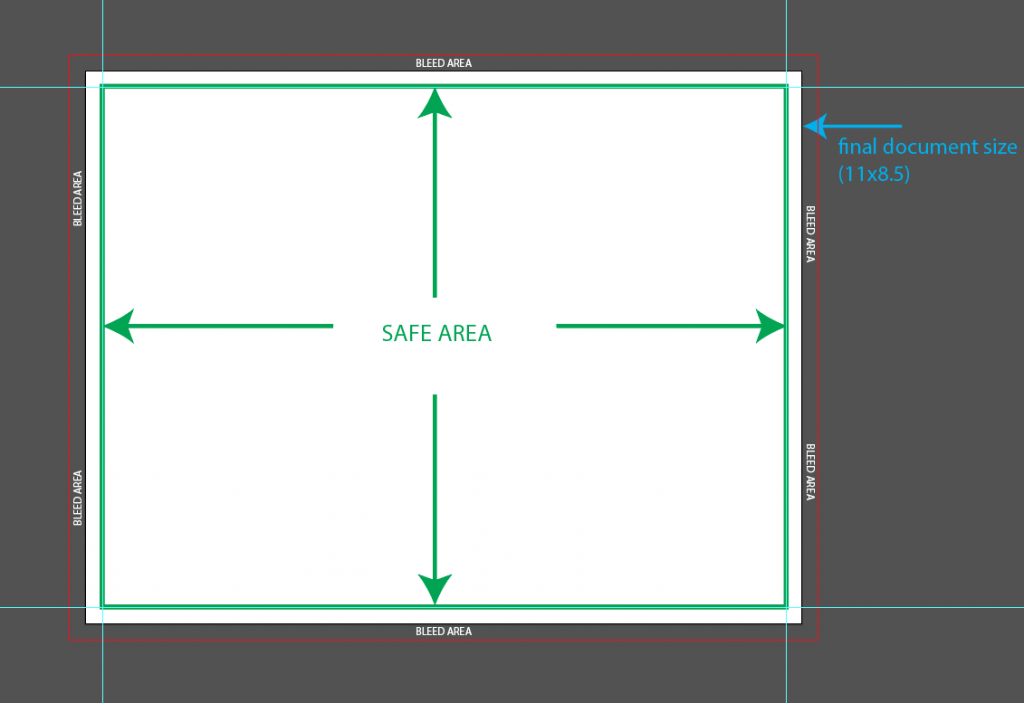
When you add your design, make sure the text is inside the safe area, and the artwork goes to the edge of to your bleed area.
Save your document as an .ai file(your working file). I save versions, v_01 or v_02 etc, you never know when things may crash.
When you are ready to save as a .pdf for press:
- File: Save as Adobe PDF (pdf)
- Adobe PDF preset: Press Quality
- The only change you need to make for most digital press is: Marks and Bleeds
- Choose: Trim marks only.
- If you set the bleed when we created the document, you can check: ‘Use Document Bleed Settings‘ or type in .25″ all the way around
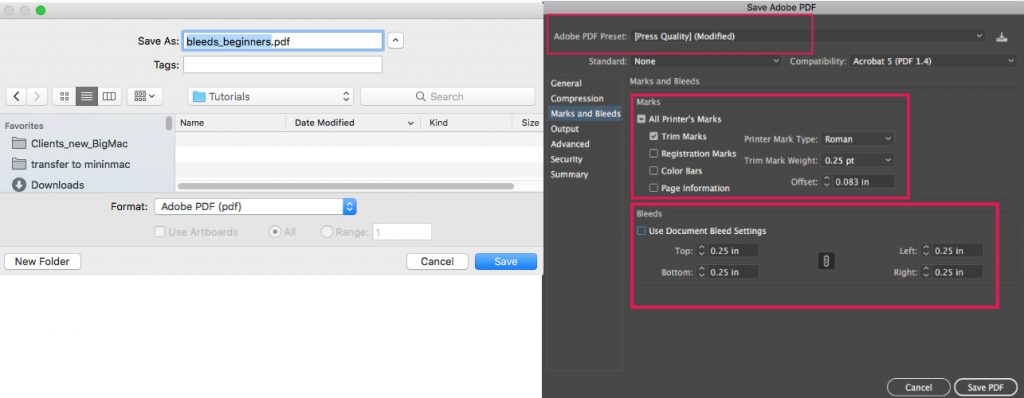
Press Save PDF… and voila!
Trim marks that the printers imposition software can read, so they don’t have to step and repeat it manually!